You have no items in your shopping cart.
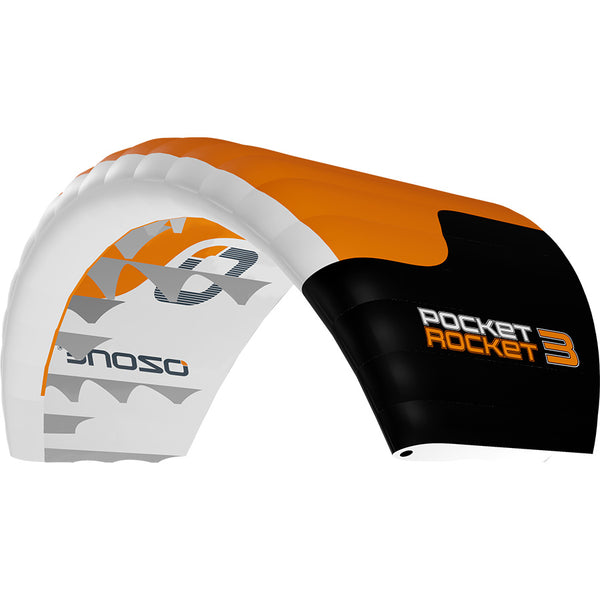

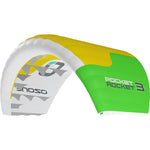
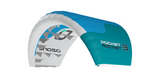
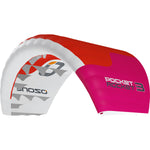
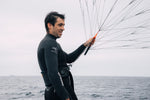

Ozone Pocket Rocket Parawing
$829.00
Ozone Pocket Rocket Parawing Introducing the Ozone Pocket Rocket Parawing: The ultimate wing designed for those who demand excellence in every ride. Whether you're chasing the perfect swell or conquering...
Ozone Pocket Rocket Parawing
Introducing the Ozone Pocket Rocket Parawing: The ultimate wing designed for those who demand excellence in every ride. Whether you're chasing the perfect swell or conquering challenging conditions, the Pocket Rocket delivers unmatched versatility, precision, and power. Elevate your adventure to new heights with Ozone, where innovation and passion meet the sky!
PERFORMANCE ADVANTAGES
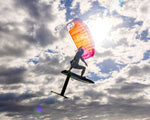
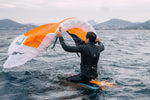
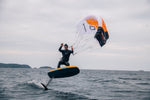
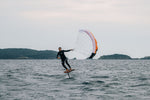
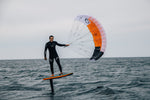
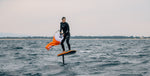
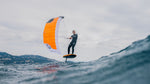
- The Pocket Rocket Parawing allows you to blast upwind effortlessly, and then easily packs away for riding swells downwind
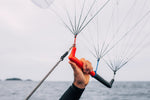
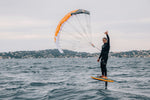
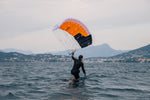
- Color-coded control bar, bridle lines and standout leading edge make it easy to identify and quickly redeploy the wing when needed
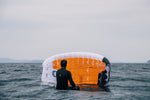
- Compact size and easy deployment also make it ideal for spots requiring a paddle out
- Ozone’s renowned paraglider and foil kite design technology enhances
stability and performance across all riding angles, especially when depowered - Accessible performance for all skill levels
USER-FRIENDLY FEATURES
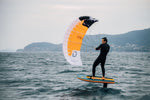
Designed with a refined bridle system for a clean canopy profile, the Pocket Rocket offers smooth, efficient power for easy foiling control.
-
Fingertip bar control for effortless upwind tacking and downwind cruising
-
No tip collapse, even when pushed hard
-
Quick and easy to stash away for pure wave/swell riding
-
Custom, lightweight, carbon-fiber control bar with contoured EVA grip for enhanced control
-
Color-coded control bar and bridle lines for quick, foolproof redeployment
-
High-quality bridle lines with optimized thickness ensure tangle free handling
-
Spliced bridle connections glide smoothly through your hands and eliminate snagging
-
Small, lightweight and fast-drying pack size


ORIGINS
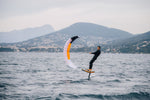
The Pocket Rocket is crafted for both friendly handling and high-performance freeriding.
- Refined with stability when depowered was key
- Leading-edge profile battens maintain aerodynamic integrity when depowering
- A carefully balanced cell and rib construction prevents tip collapse, delivering stable, comfortable riding
- Transverse Sail Shaping along the leading edge creates a cleaner surface on the most important area of the aerofoil. The result is less turbulent airflow and longer skin adhesion, which positively affects the lift-to-drag ratio increasing overall performance
Through smooth handling you can save your energies for adventure, rather than battling the wing.

Set Up:
- Place sand or weight on one tip of the wing. Lay out the rest of the wing downwind.
- Untangle the bridle lines. Apply light tension to the bridles by lifting the control bar.
- Ensure the bridle lines are free of tangles and twists.
- Ensure there are no bridle lines around the control bar or back side of the wing before launching.

*We recommend using this product without an attached leash. Riding without a leash offers more freedom, especially when stashing the wing in a pouch.
If using this product without a leash, for safety, simply let go of the control bar. The wing will fly a short distance downwind then touch the water, where it will stick to the surface. You can then paddle downwind to retrieve your wing.
If using this product with a Wrist Leash or Waist Leash (optional, not included)
- Attach the leash line to the front level leader line, color-coded in red.
- If you let go of the control bar, the wing will de-power on the front lines with minimal pull, yet it will remain flying.
- To disconnect completely from the wing; open the velcro closure of the wrist leash OR open the buckle of the waist leash.

First Use:
- Place your front hand on the control bar side color-coded in red. This side of the control bar is connected to the front (A-level) bridle lines and leading edge of the wing.
-
Place your back hand on the control bar side color-coded in grey (below the blue center leader line)
- To launch the wing, take a step backwards to put tension into the bridle lines, pulling on the red side of the control bar to fill the wing with wind.
- When the wing is flying, sheet in with your back hand (grey side of the control bar) to power up, and sheet out to de-power.
- To steer the wing, apply some tension to the back lines (sheet in slightly) and twist the control bar.
- You can also fly the wing one-handed, keeping your front hand on the control bar and sheeting in/steering the wing by twisting your wrist.
- Practice handling and steering the wing on land before riding on the water.

Water Relaunch
- If the wing is under water, take the leading edge with two hands on the left and right sides and lift up. This will assist the wing to inflate along the leading edge and drain water away
- When all the water has drained away, keep holding the leading edge with one hand, then take the control bar (red side) in the other hand
- Let go of the leading edge and pull the front (A-level) bridle lines / red side of the control bar to launch the wing

Packing
- Dry the wing before packing, or hang it to dry once you’re home and re-pack before storing it.
- Pull all front (A-level) bridle lines from the control bar side to the wing canopy by hand. This will automatically position all the leading edge reinforcement battens next to each other.
- Ensure the leading edge reinforcement battens are stacked on top of each other, not forced out of shape.– Place the bridles into the lower canopy, with the control bar on top of the stacked leading edge.
- Fold the rest of the wing around the control bar/leading edge and carefully fit it into the bag.
- Double check that none of the leading edge reinforcement battens are forced out of shape.

WATER SELF RESCUE
Pack the wing as described in PACKING.
Aim to keep the control bar away from the bridles to prevent tangling.
Place the wing on your board and paddle back to shore.

PRODUCT CARE
This is a technical product used in harsh outdoor environments. Use common sense and care for your equipment.
- Avoid placing the wing on hard or rough surfaces.
- This product is designed to fly. Do not leave it unattended on the beach or allow it to flap in the wind. Always pack it away when not in use.
- While stashing the wing during riding, it’s difficult to maintain the leading edge battens perfectly. However, when packing for transport or storage, ensure the leading edge battens are not forced out of shape, as they may not return to their original form if left deformed for too long. This is not valid for warranty.
- Never leave this product un-used for long periods of time in the sun and wind. UV, canopy flapping due to wind, sand etc hitting the sailcloth can all severely shorten the products lifespan.
- Never pack this product wet, only when completely dry. Packing wet can damage the material and its coatings and may lead to dye running. This is not valid for warranty.
- Never leave this product inside a car or in direct sunlight.
Repairs & Maintenance
Your parawing includes a repair kit with the following contents:
- A4 pieces of sail cloth
- A4 piece of sticky sail cloth
- Tear-Aid sticky repair patch
- 2 meters of bridle line
For minor tears you can easily fix these yourself with the repair kit supplied with the wing. If you have a major repair such as a tear across panels, take the wing to your local repair shop.
Videos:
Need to stash it away? Try the Ozone Parawing Stash Belt.

Orders are usually processed and shipped the same day the order is placed. We do our best to get items out as quickly as possible, and are centrally located in Texas so most items will be 2-day shipping even with ground service. Domestic orders to the continental USA are shipped via UPS unless it is a small item. Small items are shipped via USPS. Most International orders are shipped via DHL express. Tracking numbers are available via this site in your account order page. if you want expedited shipping just choose it from the menu or call us at 281-508-6485 for any shipping problems or concerns.